FLX SCREEN is our popular one-component all-round photo emulsion for textile and graphic printing. This environmentally friendly emulsion can be used for printing with water-based inks, plastisol inks and even discharge inks. It is technically convincing across the board and has many properties that are otherwise not available on the market in this combination.
The emulsion is resistant to water, abrasion and solvents, making it perfect for printing large print runs. Thanks to the high edge definition and excellent mesh crossing, even fine motifs can be sharply exposed with this coating. With a solids content of 43 %, the emulsion is relatively viscous and applies so well during coating that a high, sharply defined print shoulder is produced. FLX SCREEN delivers the best results on both white and yellow mesh and impresses with its very short exposure time.
The product is available in 250 g tins, 1 kg containers and 4.5 kg buckets.
The photo emulsion should be stored at room temperature between 10 °C and 30 °C. The container must be protected from frost and direct sunlight. The shelf life is 1.5 years. We recommend processing the photo emulsion under yellow light.
Several screens can also be coated in stock if they are then stored in the dark. If required, they can then be exposed within 3 weeks. The screens must be dried again with warm air immediately before exposure.
Der zu beschichtende Siebdruckrahmen sollte trocken und staubfrei sein. It is therefore advisable to clean the screen frame with degreaser, such as ours DEGREASER25, before coating and then to dry and store it as dust-free as possible until coating.
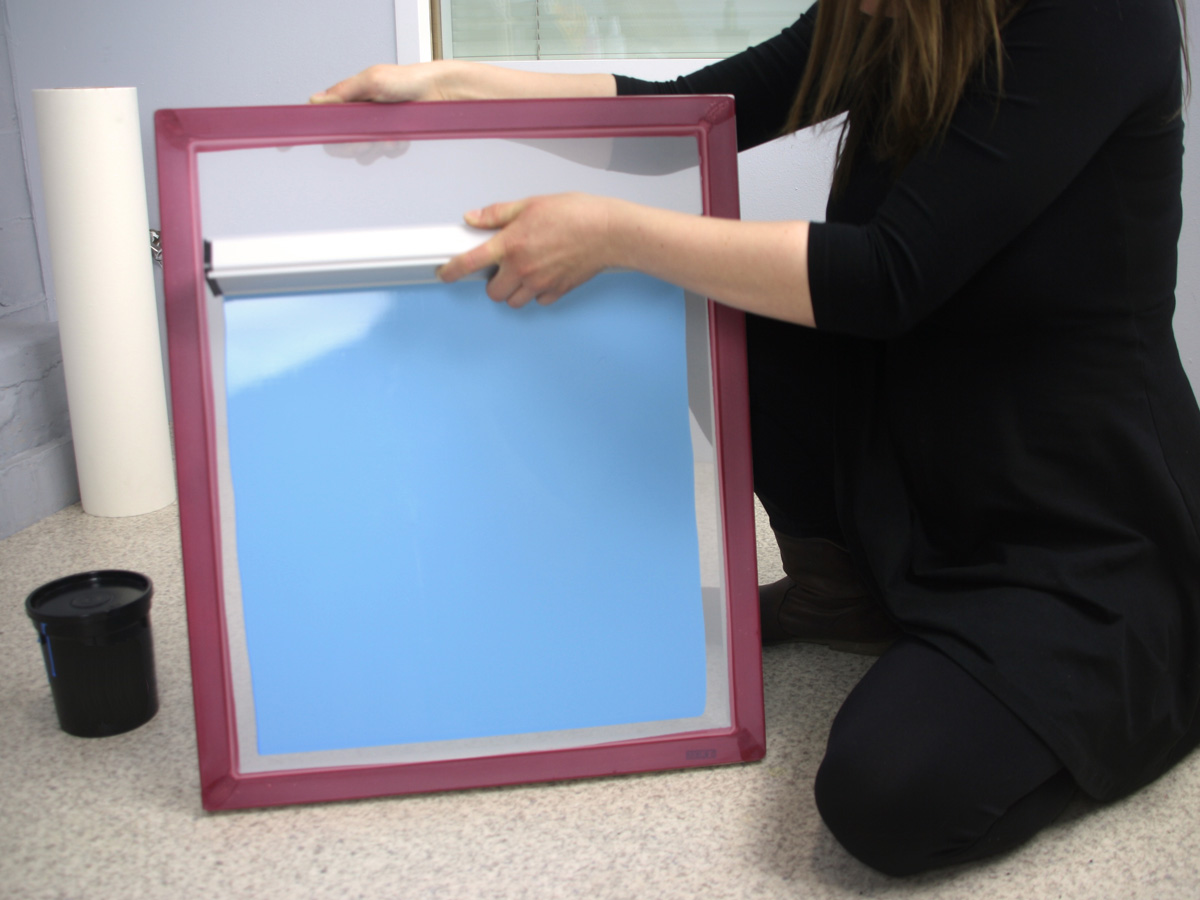
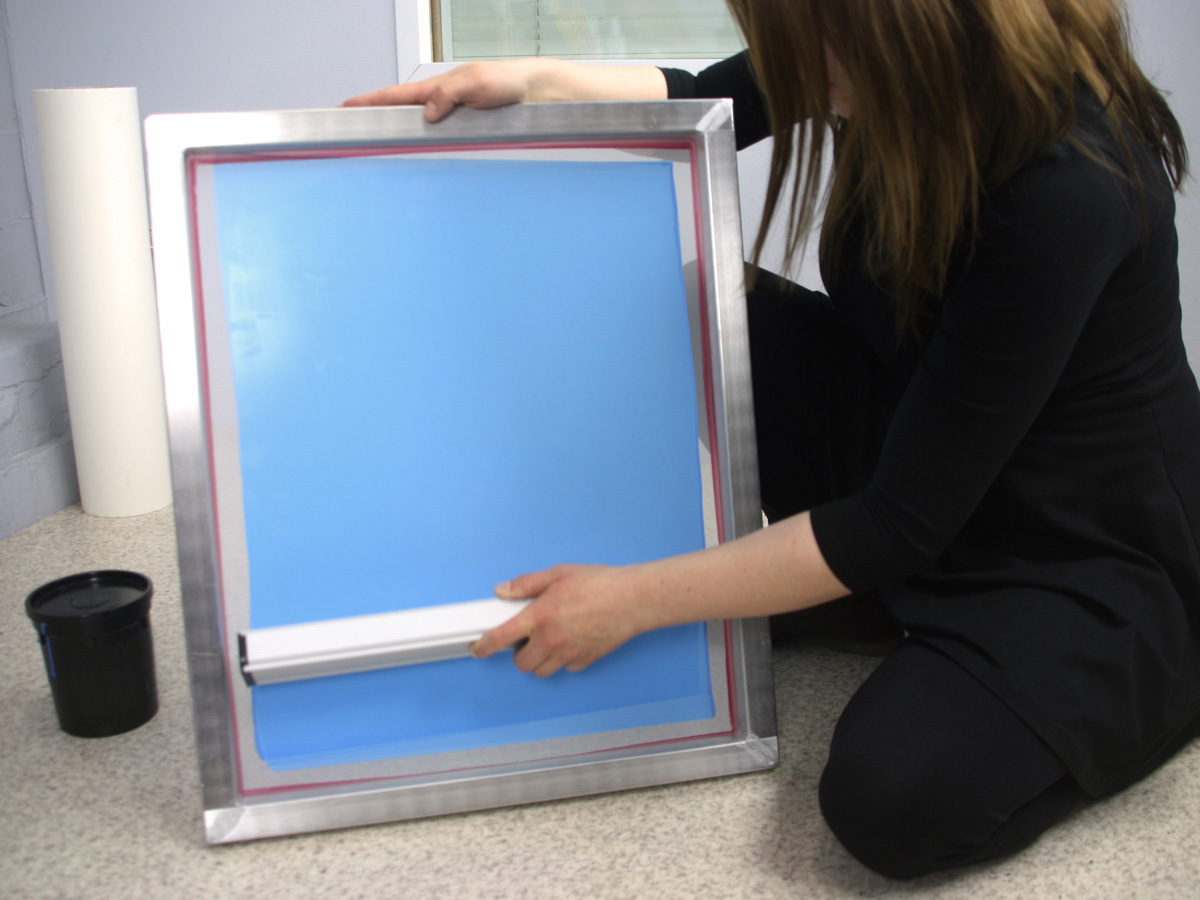
The emulsion is first poured into a suitable coating trough until it is about half full. It is then coated first on the print side (outside, Fig. 1) of the screen and then on the squeegee side (inside, Fig. 2). If dark textiles are to be printed with the screen later, the print side can optionally be coated wet on wet twice in succession. This builds up a thicker emulsion layer on the screen mesh. When printing later, a correspondingly higher ink application is achieved.
A comfortable working position is recommended for coating, which allows the gutter to be guided firmly and safely over the frame. If you do not have a coating stand, you should coat as shown in the photos.
No master has yet fallen from the sky! Good coating is a matter of practice. The coating on the fabric should initially not be applied too tentatively, but with medium to high contact pressure. If the coating is applied with too little pressure, too much emulsion will be applied in the worst case. The excess emulsion will then form lugs and drip off the screen. In practice, such thickly coated screens can neither be dried nor exposed correctly. In this case, it is recommended that the screen be washed out and recoated. The aim is to apply a uniformly thin layer of emulsion.
Experience has shown that novice screen printers in particular tend to apply too much emulsion rather than too little. Our urgent recommendation to beginners is therefore to coat each side of the screen exactly once with the sharp edge of the coating trough.
After coating, the emulsion from the coating channel is poured directly back into the container to prevent unnecessary drying. The emulsion channel should be cleaned directly with water after coating. This applies in particular to the edges.
If the written word is not enough, you can also watch our practical YouTube video on the subject. To be found under the title: Anleitung zum Beschichten von Siebdruckrahmen mit Fotoemulsion
After coating, the screen is dried horizontally with the print side (outside) facing downwards. This allows the emulsion to sink deep into the mesh and form a pronounced printing shoulder. The light-sensitive emulsion must be dried in the dark or under yellow light. When drying, make sure that the humidity is below 35 %.
CAUTION: Insufficiently dried, moist emulsion is difficult to expose and, in the worst case, can lead to completely incorrect exposures. The emulsion will then peel off in places or over large areas during development. We therefore strongly recommend that you always dry the emulsion layer at around 40 °C for 1 to 1.5 hours using a fan heater before exposing. These only cost a few euros and can be purchased at any DIY store or supermarket. For professional use, circulating air drying is carried out in a drying cabinet.
If stock-coated but unexposed frames are dried and temporarily stored in cupboards, boxes or cartons for many days, they should definitely be dried again at 40 °C before exposure. This is the only way to ensure that the often barely perceptible (residual) moisture can evaporate from the supposedly dried coating. NOTE: Emulsion attracts water. In damp environments (cellars, cold workshops, bathrooms) it tends to attract moisture from the room air.
Particular attention must be paid to drying the emulsion. Only a completely dry emulsion can be exposed perfectly. A good 80 % of problems with subsequent exposure and even with decoating are due to incorrect or insufficient drying beforehand.
The frame with the well-dried and evenly applied FLX SCREEN emulsion can be exposed with all commercially available exposure units. The exposure time varies slightly depending on the exposure unit used, the layer thickness of the emulsion and the distance between the exposure lamp and the screen.
In the semi-pro and DIY sector, compact exposure units such as our UV LED 10 W exposure lamp (article number: BL0001) are generally used for exposure. Alternatively, 400 watt halogen exposure units can also be used. With the usual 2/1 or 1/1 coating and a distance between screen and lamp of approx. 50 cm, the following exposure times result:
| Fabric color | Exposure time with exposure lamp UV LED 10 W | Exposure time with exposure lamp Halogen 400 W | Exposure time with UV LED- Vakuumbelichtungstisch |
|---|---|---|---|
| White | 2:30 to 2:50 minutes | 4 to 5 minutes | 0:20 minutes |
| Yellow | 3:20 to 3:40 minutes | 5 to 6 minutes | 0:30 minutes |
Practical video instructions for semi-pro exposure can be found in Teil 4 - Fotoemulsion belichten | Siebdruck selber machen of our comprehensive screen printing guide.
The exposure time is usually considerably shorter with the UV vacuum exposure tables commonly available on the market or the newer LED exposure units. With the FLX SCREEN, it is often between 20 and 30 seconds. The ideal exposure time can be easily determined using a strip exposure test or an exposure calculator (article number: KALKU1).
After exposure, the motif is washed out directly. To do this, first apply water to both sides of the screen stencil without applying pressure. The stencil should then soak untouched for about a minute under yellow light or very weak artificial light. The motif should already settle slightly and become easily recognizable. After the soaking time, you can start to rinse the motif from the print side using higher water pressure. Finally, the screen is rinsed thoroughly once again with a soft jet of water to rinse out the last emulsion residues (sludge) that are difficult to see with the naked eye.
The emulsion should now feel firm and no longer greasy. If the layer still feels slimy or if pieces of the stencil come off unintentionally and in shreds, then the exposure time was not sufficient or the emulsion was very likely not completely dry before the exposure.
If the subject is almost impossible or very difficult to rinse, the exposure film was too translucent, the exposure time was too long or the rinsing was done in daylight or strong artificial light.
Once the screen has been successfully developed and dried again, it is imperative that it is re-exposed before color is applied to the screen for the first time. The finished frame with the desired motif is therefore placed under the exposure unit once again and re-exposed for 2 to 3 times as long as it was previously exposed - without the exposure film, of course.
This post-curing makes the screens very resistant to abrasion, harsh cleaning agents and, above all, the water in the screen printing inks. In addition, a well post-cured emulsion can later be decoated much more easily and even without a high-pressure cleaner.
If the weather permits, post-exposure can also be achieved by direct sunlight. However, daylight alone is not enough.
Decoating can be carried out with our ULTRASTRIP25 decoater. The screen is first completely cleaned of ink residues, especially at the edges of the motif. We recommend the use of a suitable screen cleaner such as WASHOUT-AQ for water-based screen printing inks. The ready-to-use decoater is sprayed generously onto both sides of the screen. Leave it to work for 3 to 4 minutes and then rub with a decoating sponge. The softened and dissolved emulsion is then rinsed out of the fabric at high pressure (ideally with a high-pressure cleaner). In practice, it is usual to degrease the frame immediately after decoating, allow it to dry and store it dust-free for the next coating.
If stubborn emulsion residues cannot be removed despite correct decoater application, this is often due to insufficient drying of the emulsion BEFORE exposure. Failure to post-expose can also lead to decoating problems. In this YouTube video, we have summarized how to avoid problems during decoating and what measures can be taken to remove the emulsion residues anyway in a beginner-friendly way.
If the exposure is not successful at the first attempt, there are usually simple causes that can be easily remedied. The most common problems for beginners have to do with too thick a coating, incorrect drying of the emulsion or arbitrarily set exposure times. We have produced a trouble-shooting YouTube video to help you solve these typical beginner's mistakes: Probleme beim Beschichten / Belichten von Emulsion lösen
Problem not there? Then we will be happy to help you find the cause. For a precise analysis, it is very helpful if we receive a few informative, high-resolution photos of the problem at info@siebdruck-versand.de

